
Begonia Hand Pollination Experiment

Hand pollination has always fascinated me. I know that growing houseplants eliminates the possibility of most natural pollinators having access to my plants, but I really want seeds! I likely have the occasional bug or insect creeping around, but of course I won’t have the bats, tree frogs, butterflies and moths that (among other creatures) would be pollinating these plants in the wild. Symbiotic relationships abound in nature, and plants have specific relationships with insects and bugs that help them along reproductively. Lacking those symbiotic relationships in our homes, I wanted to learn more not just about hand pollinating my plants, abut also about growing from seed. My fascination began with pollinating Aroids. I’ve had several Aglaonema and Alocasia in bloom over my time as a houseplant parent, but I was hesitant to try. I can’t really say why, it just scared me. Perhaps it has something to do with the fact that most of my Aroids had one inflorescence at a time, and that one chance seemed intimidating to me. The female portion at the base of the spadix is only receptive to pollination for about 24 hours, and I never felt confident pinpointing that 24 hour window. Although pollinating the female portion of the plant with the male portion of the same plants totally doable, it’s also possible to collect pollen from the same plant or another, and save it in the freezer for use at a later time. With many of my Aglaonema, I let several chances to pollinate pass, and to this day I have not attempted my own pollination. I didn’t even freeze the pollen. Instead, I purchased and planted Anthurium seeds from a very knowledgable grower. I trust her to know pretty much everything when it comes to Aroids. Aroids will be my chance to experiment with growing from seed. We’re talking about Begonias, though, and for those I turn to a different expert.
About a month ago, I had a friend over who’s wild about Begonias. He has the coolest job in the world. He just works with plants all day long. He had stopped by about a Philodendron Congo, but we got started about Begonias. He commented about my Begonias flowering and mentioned something about how easy they are to pollinate. I felt excitement, then dread. I was thinking about my inability to dive in and pollinate an Aroid, any Aroid. He explained that rather than having male and female parts on the same inflorescence like Aroids, Begonias have male and female flowers on the same plant and it’s very easy, due to the many flowers and their various stages of fertility, to hand pollinate. I asked him to give me a brief tutorial, and let me just tell you…this has changed my life. That might be a bit of a stretch. It’s just really fun. The first step is identifying the male from the female flower. I’m going to use my Begonia ‘Lana’ as the example because she’s big and beautiful, but also because this is the plant I’ve been pollinating.

The Male Begonia Flower
The male flower is simpler than the female flower because it has no need to carry the portion where, should pollination occur, the seeds will develop. Notice the flower is connected to the plant by thin pink bits.


The best way to differentiate the male and female flowers is to show you. Notice the difference in the structure that connects the flower to the plant.
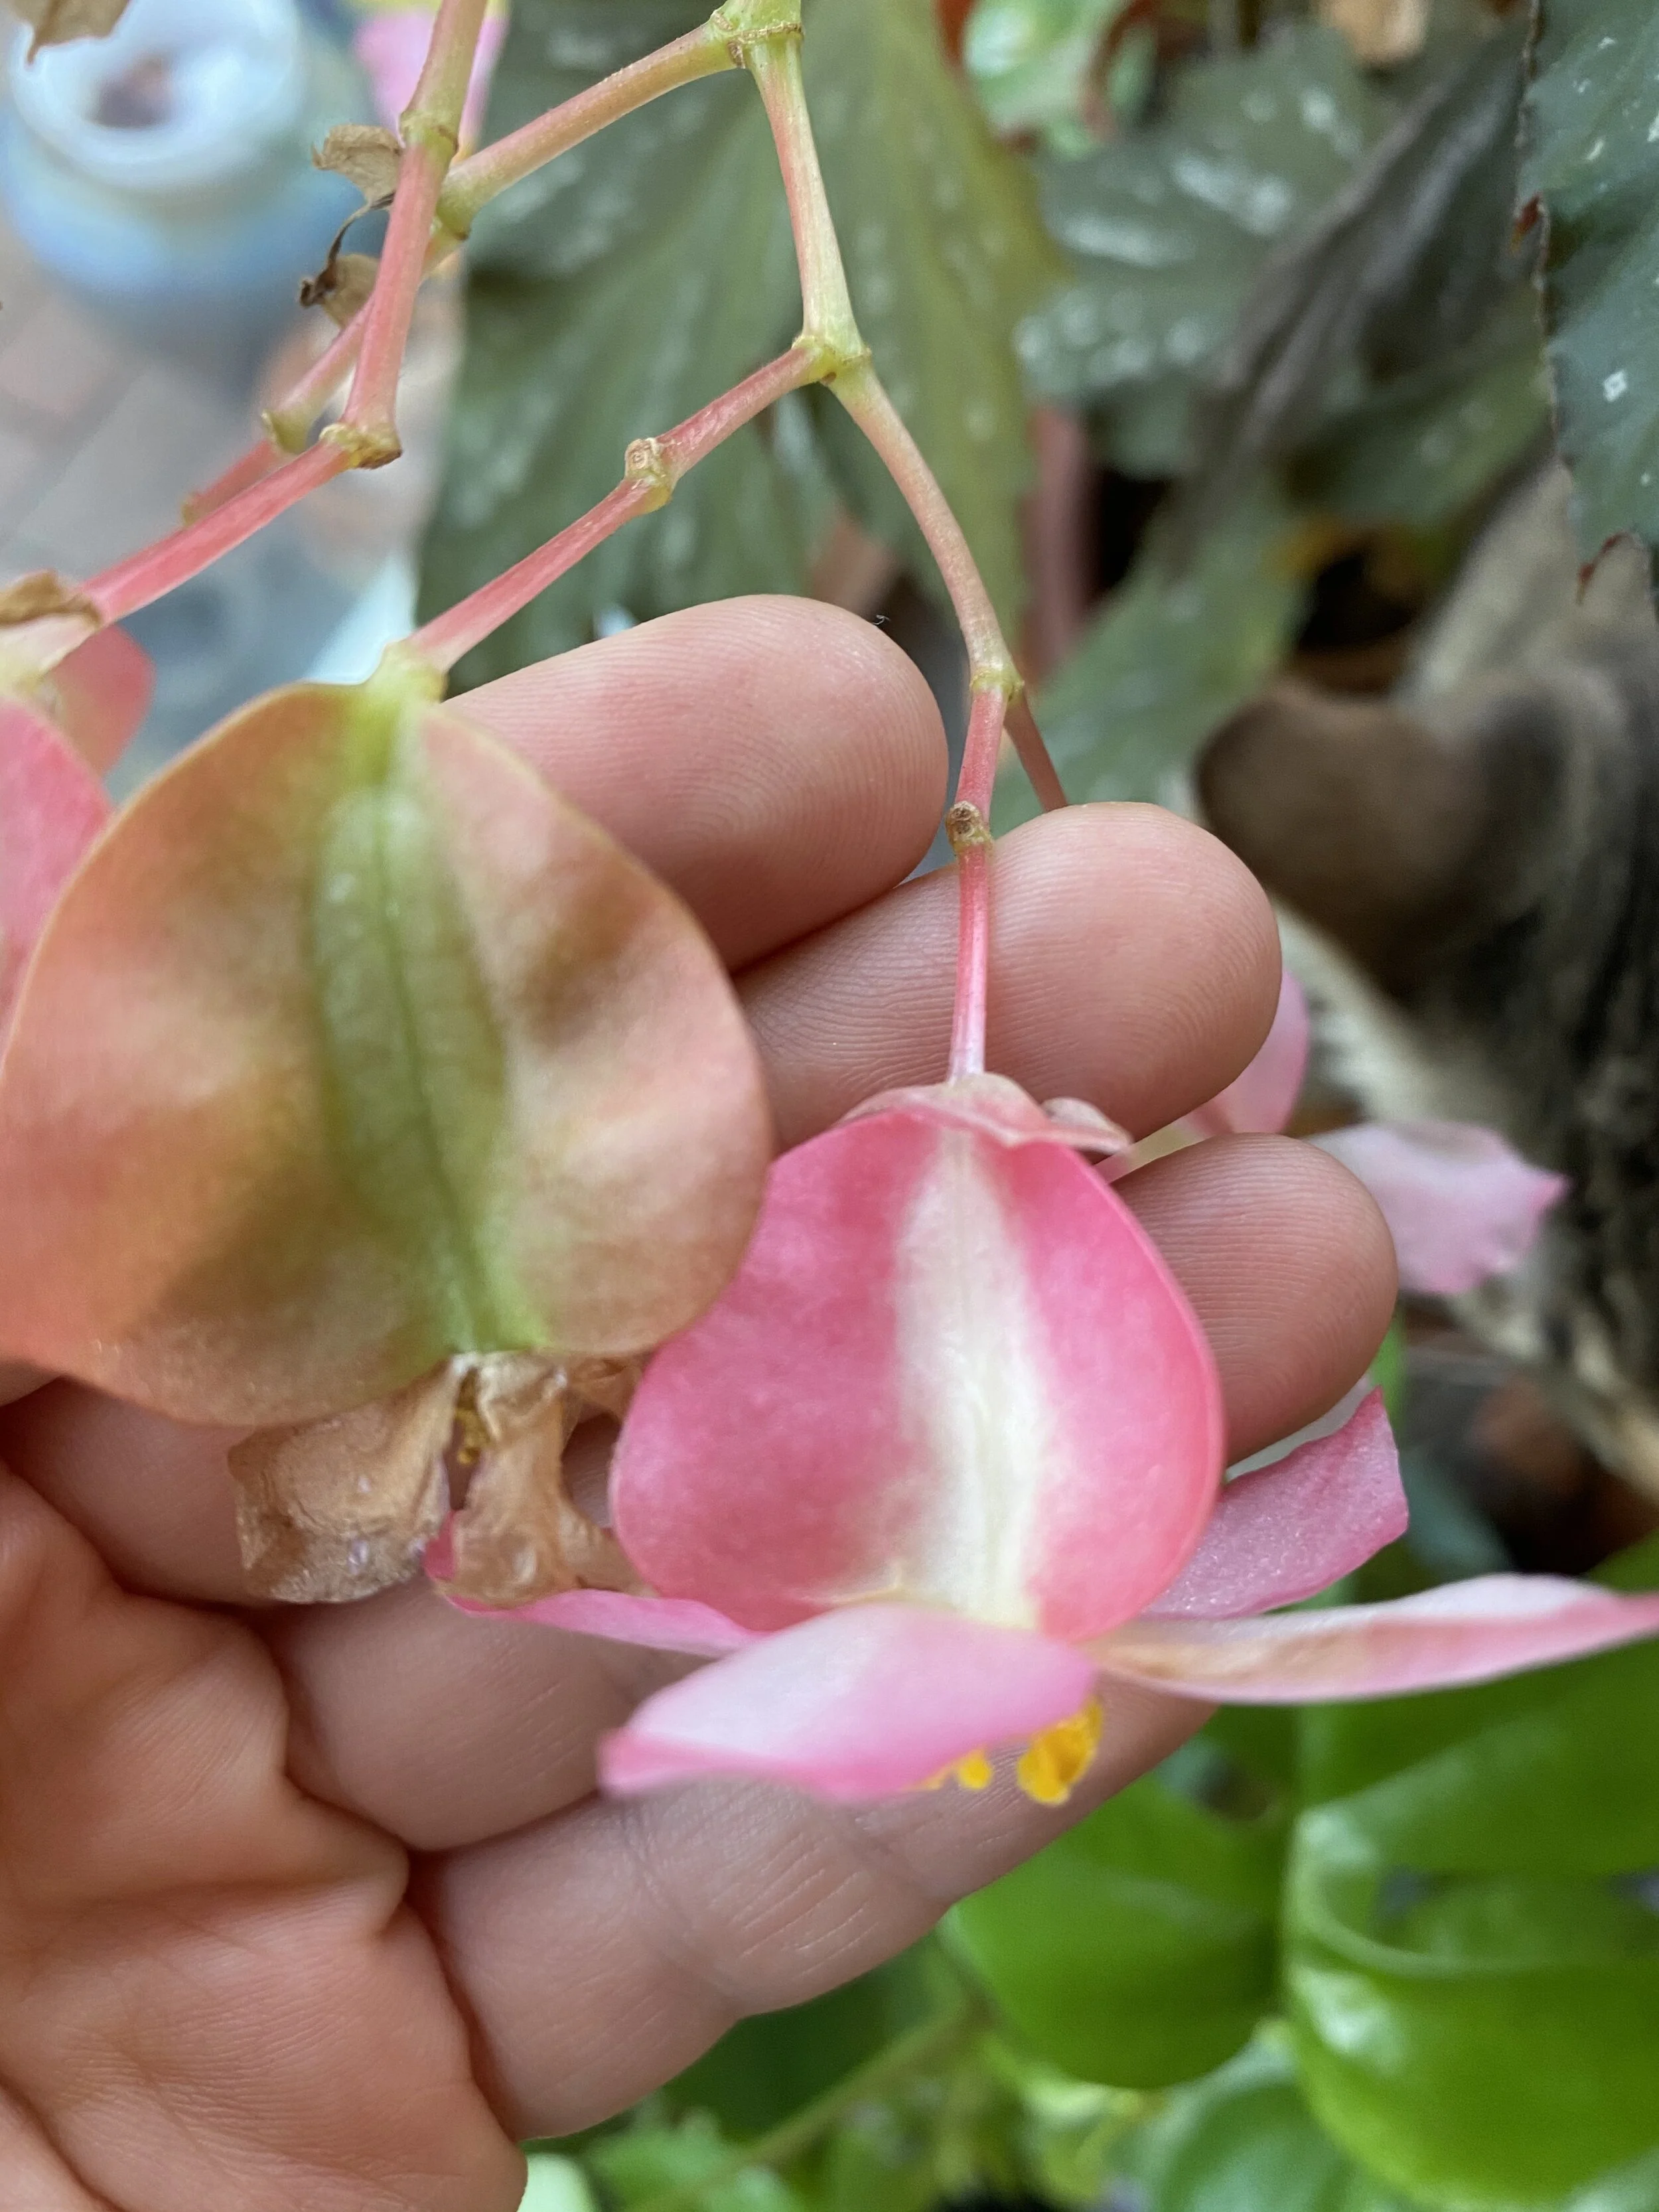
The Female Begonia Flower
The female flower, as mentioned above, has a more complex shape and purpose. It will carry the Begonia seeds, so there must be a protected space for these seeds to develop before they become viable. See the portion behind the flower, as well as how both the pink and the yellow portions differ in shape, size and texture from those on the male flower.


Pollination
On ‘Lana,’ the male and female flowers develop in separate clusters. This makes it even easier to determine which flower you’re seeing. On some of my smaller Begonias, the difference can still be seen, but I have to look a little closer. There might be male and female flowers coming from the same cluster. This is the case with my Begonia ‘Sinbad.’ Notice the female flower sits below the male flower on the same cluster.

Begin by cutting the physically mature male flowers off and setting them aside to dry. I bypassed this step on my first round of pollination (because I’m impatient) by picking some male flowers off the floor that had dropped and already started to dry. At the same time, I also cut some male flowers and set them aside so I could do a second round of pollination in a few days. The purpose of cutting the male flowers and waiting a couple of days is to allow the pollen to dry out. It’ll spread easier that way. See my dried male flowers below.

I placed them in a spare lid I had available and grabbed a round paintbrush to use to apply the pollen. I had to crunch the flowers up a bit with the brush before I was able to see the pollen collecting in the lid. You can see the yellow in the center of the lid, but it’s faint. This won’t be a dramatic display of pollination. I was just trusting that it was working most of the time, although I was able to see a very faint dusting in the air.

Next, just gently apply the lovely yellow dust to the yellow center of the female flowers. Because I was experimenting, I also took the male flowers and rubbed them onto the female flowers, just to be sure.
Over time, the female flowers have started to swell and change color. I’ll show a few photos taken over time to illustrate the change. The first photo is the day of the experiment, the second was about two weeks later, and the last was taken today.


Finally, here is a comparison of a flower that I did pollinate next to one that I didn’t. In my experience, the flowers like the one on the right will eventually fall off, or I’ll cut them if they start to look wilted. The flowers that I pollinated have continued to swell and change colors, but I have no idea what’s actually going on in there. This is an experiment that I wanted to try, and I’m choosing to share it because I found it so fascinating when I learned from my friend that it’s fun and easy. Maybe the’ll all fall off, too. Maybe nothing is going on in there. For me, experimentation (as long as it isn’t with Aroids) is part of the fun. I would love to have seeds come from this experiment. That would be really fulfilling after watching this process unfold for a month. If nothing happened and the flowers fall off, I’ll just try again. As long as I have flowers there, I’ll keep trying. I have more flowers coming on Begonia ‘Sinbad’ and one of my Fern Leaf Begonias as well, so I’ll probably try with those as well.
Once I get to a point where I can tell that the pollination has been successful, I know that the seeds will need to be removed and dried in preparation for planting. If I get to that point, I will add those steps in as an update, or add a new blog as a continuation of this one. Fingers crossed.
Updates Available! Check out Parts Two and Three of this story!
If you’ve had success pollinating Begonias or any other plant, I would love to hear about it! Feel free to send me an email from the link below, comment on this page, or find me on Instagram!