Building a Greenhouse Cabinet

I don’t think it’s any secret that I want a greenhouse. I want a massive spectacle of a greenhouse in my back yard with all the necessities to keep plants happy the whole year long. A paradise for my plants and me, if you will. That includes a heater for the cold Ohio winters, and lights for when I want to be out past dark basking in the glory. I could go on forever about the custom modifications I would make to create the most epic manifestation of my dream, but there’s an inconvenient truth I’d be dodging. I don’t have the proper setup for a greenhouse, not a real one anyway. It would be in poor taste and outright wrong to sacrifice the decades old trees in and around my yard to allow the sun to shine through, and I haven’t even dared to estimate the likely horrific cost of the greenhouse structure, not to mention the price of the plants I’d be packing inside.
So, let’s just say a real greenhouse is off the table, so to speak, for my foreseeable future. One day you’ll check-in to discover I’ve managed to pull a greenhouse out of my figurative hat, but for now, I’m coping by other means. I’ve dabbled with terrariums and I work like a mad woman to keep the humidity of my entire home above 60% regularly, but I’m not really satisfied with that, and I have a feeling some of my choosier plants aren’t either. I’d been mentally processing, slowly working up to fashioning an accommodation for those diva plants, but the ways and the means hadn’t come to me yet. The solution didn’t hit me until I came across a photo of the IKEA Fabrikör glass shelving unit functioning as an indoor greenhouse. The IKEA Fabrikör shelf turned greenhouse isn’t new, but it is something I wanted to try as soon as I realized that this would require very little hunting, gathering, and cost on my part. And I really do mean that.
How little hunting, gathering, and cost? Well…I have two of those shelving units in my home, barely even put to use. One of them, in fact, was essentially empty. I have enough grow lights to illuminate the entire night sky. I have timers and humidifiers, several still brand new in boxes. I doubt I even need to mention that I have the plants. I definitely have the plants. The only thing I needed to buy for this project was a small fan. It was around $15. Other than that $15, the only price I paid was measured in blood, sweat, and tears (I kid) but mostly just my time. I had a few plants that needed to be repotted and I had to throw a couple of coir poles together for some plants that had outgrown their previous setups. My rough guess at the cost of this project (should you not have items on-hand like I did) would be $250-300, excluding plants. That’s just a guess, so let’s break it down and see.
List of Supplies:
IKEA Fabrikör…$169
Grow lights… ~$35-45 for the two bulbs and two lamps I’m using
Humidifier… price varies, but mine was $35
Fan $15
Power strip $5
Clear tape for cable management $6
Humidity meter $10
So we’re looking at around $275-285 minus the cost of tax and plants.
Just a Few Notes:
I use GE grow lights, which typically cost $10-15 each, and I’m using two. The lamps are just clip on utility lamps from the hardware store for around $5 each, and I’ve placed them on top of the glass. They don’t generate heat, so I feel fine with the lamp resting on the glass as long as the bulb isn’t making direct contact. I had a gift card for a specific hardware store, and I had used it a while back to purchase the only humidifier they carry for $35. Humidifier choices abound, so you could certainly find a unit that suits your fancy (more info on that later). I will end up getting a larger fan for future use, I knew that as soon as I opened the box.
Putting it All Together
Unless you are hauling and assembling your Fabrikör, organizing your supplies and plants will be the extent of this project.
I began by emptying my Fabrikör and giving it a thorough cleaning. There was nothing significant stored in it, but regardless of that fact, I’ll spare you the “before” images. It was dusty, I’ll just say that.

This is the inside of the Fabrikör with the cleaning solution soaking. I used plant based cleaner, just in case. I’m going to be storing a lot of precious plants inside, and I don’t want any chemicals causing trouble.
At this point, I only had one light on top of the unit to illuminate the space while I worked. We’ll get to adding the second light and managing the cables on the back of the unit later.
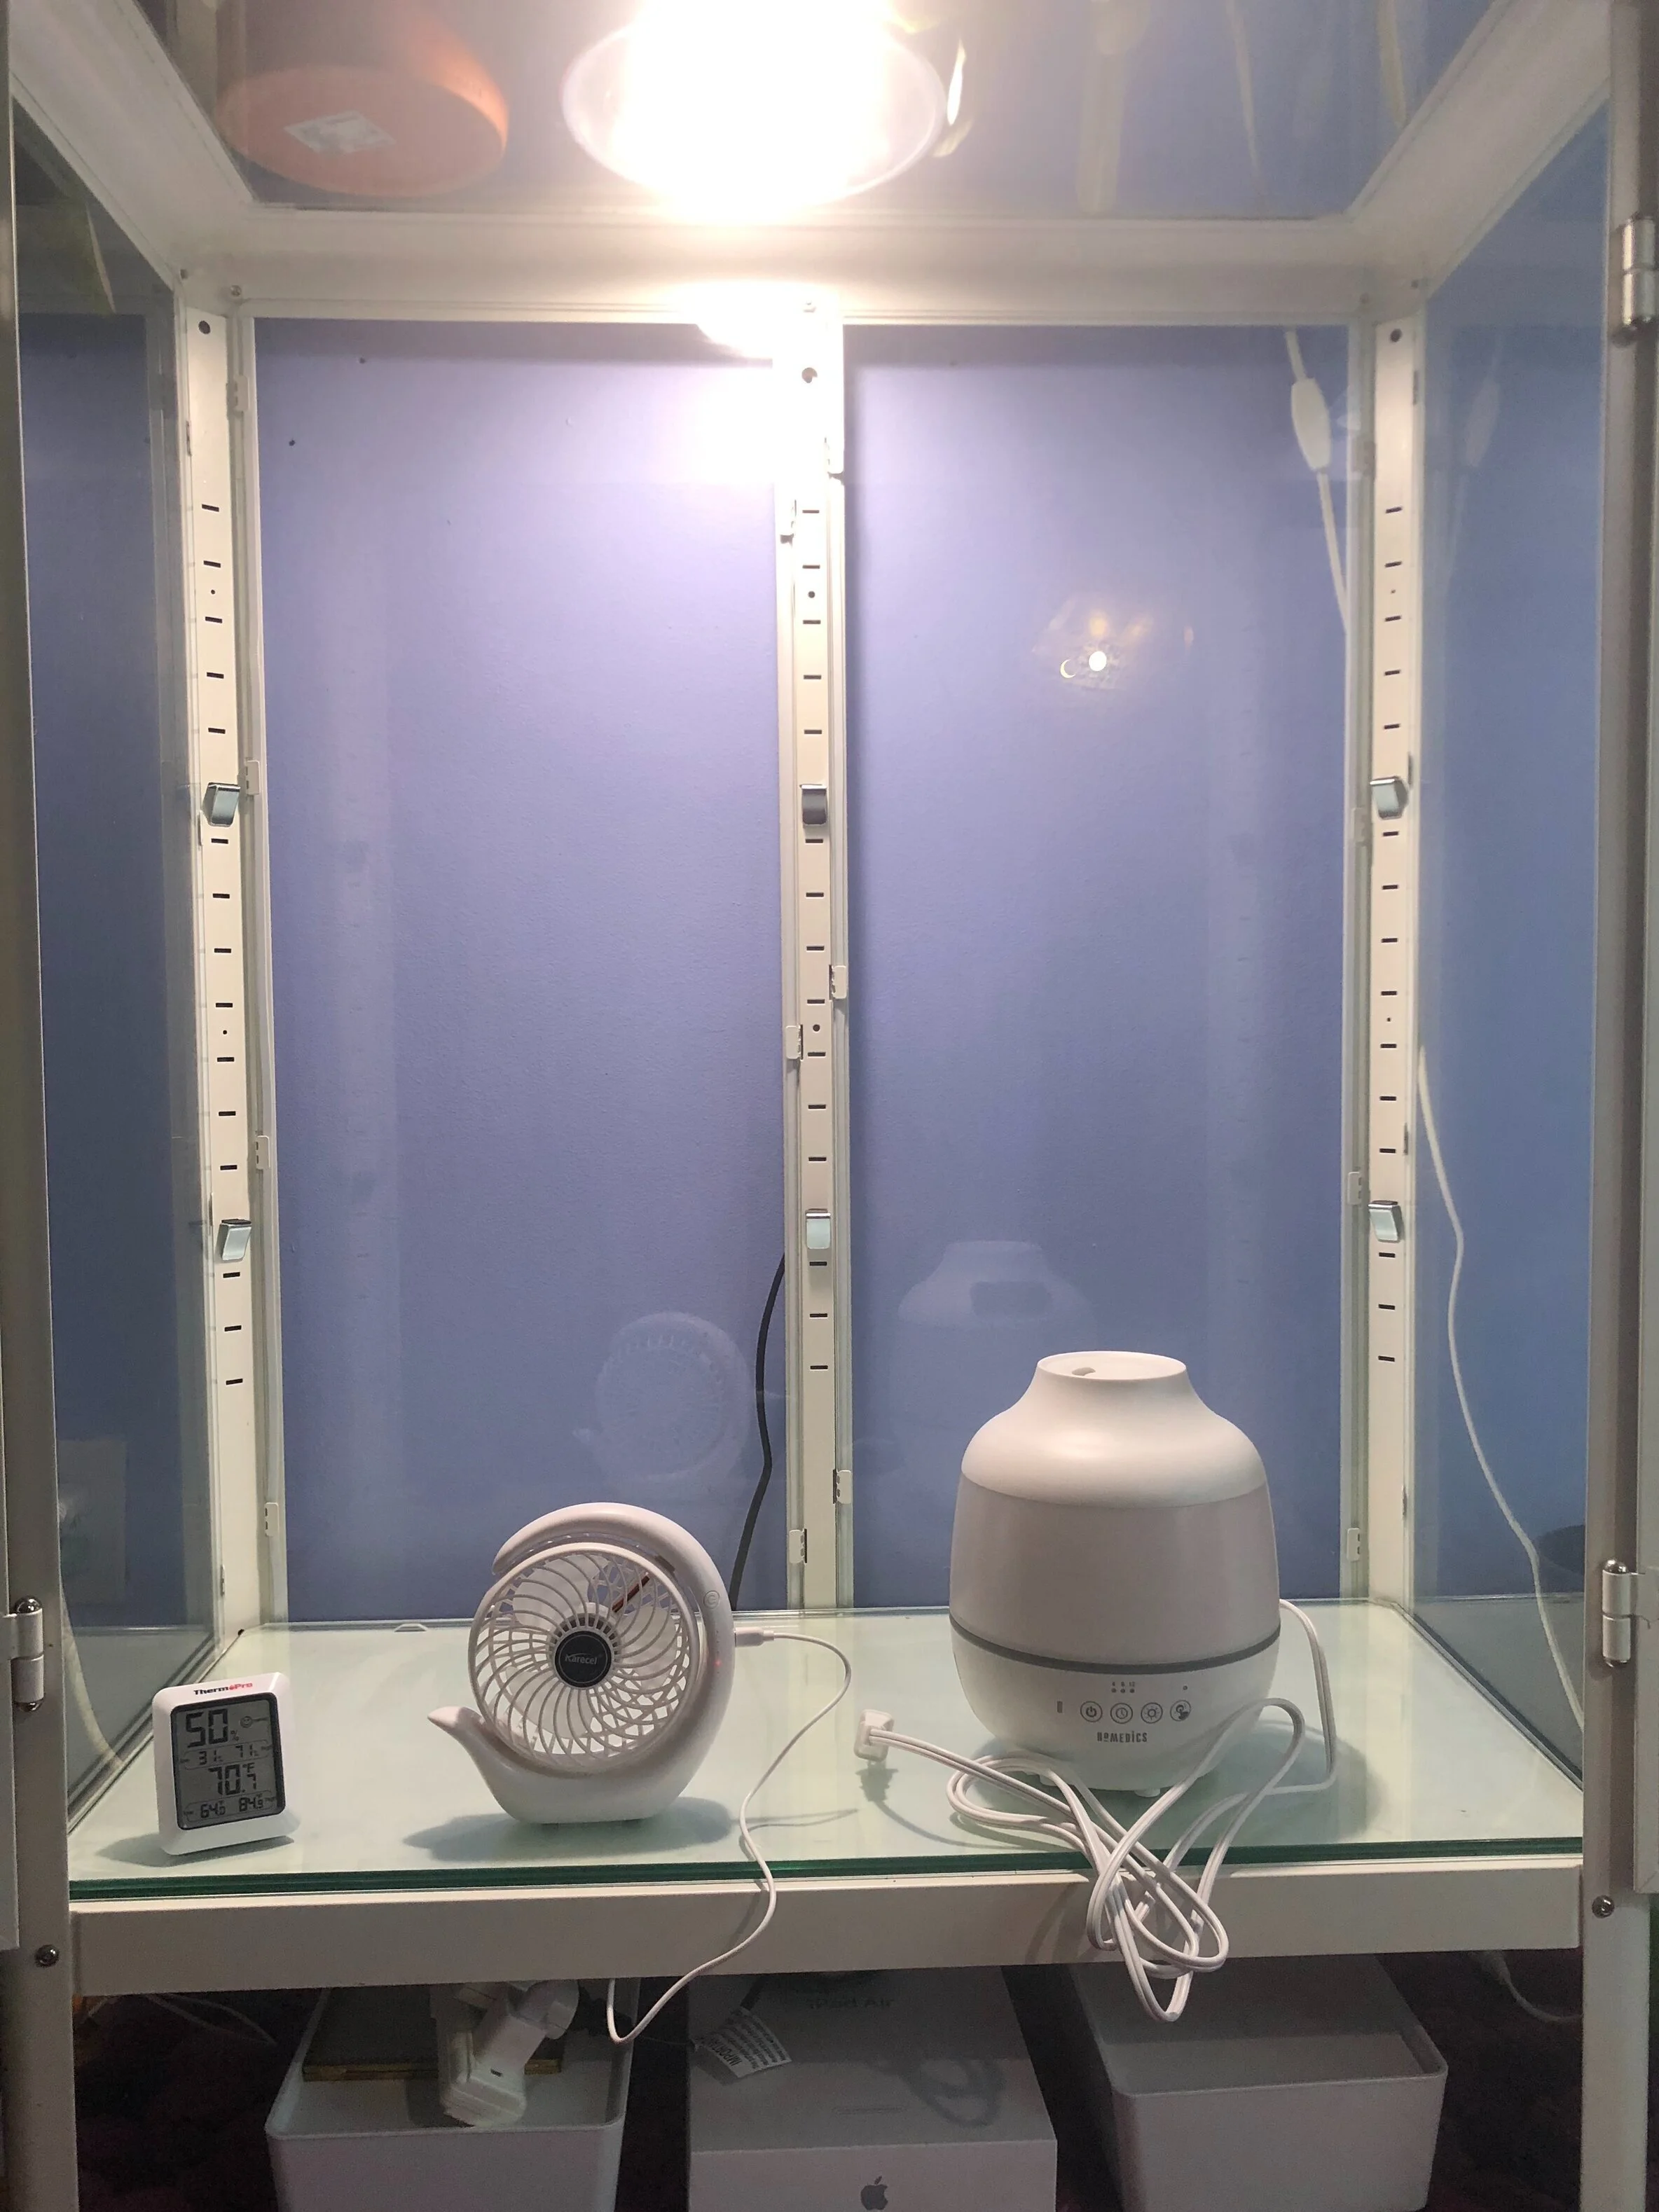
After tidying the inside, I prepared my humidifier and fan for cable managing. This step involves bringing in the power strip, the fan, the humidifier, and the humidity meter. The humidity meter isn’t corded, it was just there to satiate my curiosity at this point. I put it inside the Fabrikör while I set-up, simply because I was curious of the starting humidity inside the glass. I don’t consider 50% an undesirable number, but I’m looking for closer to 75% for the plants that will be inside this greenhouse.
I knew in advance that I only wanted to use one of the two shelves that come with the Fabrikör. I have some tall vining plants that will eventually grow larger, and I want the flexibility to remove the single shelf and give them more room to grow. I stacked one shelf into the bottom of the Fabrikör and set the second aside to be put to use later.

It was totally unplanned, but the glass shelf did a fine job of guiding the humidifier cable to the door via a small canal. The cables will eventually squeeze between the unit and the closed door, tucking into the underside of the Fabrikör where they’ll plug into the power strip. At this point, I wasn’t sure where I wanted to put the fan because I hadn’t started filling in the plants yet. Finding a prime spot for the fan will be essential. Air circulation is critical inside the greenhouse because it keeps mold or mildew at bay as well as mimics the environment in which these plants would naturally live.
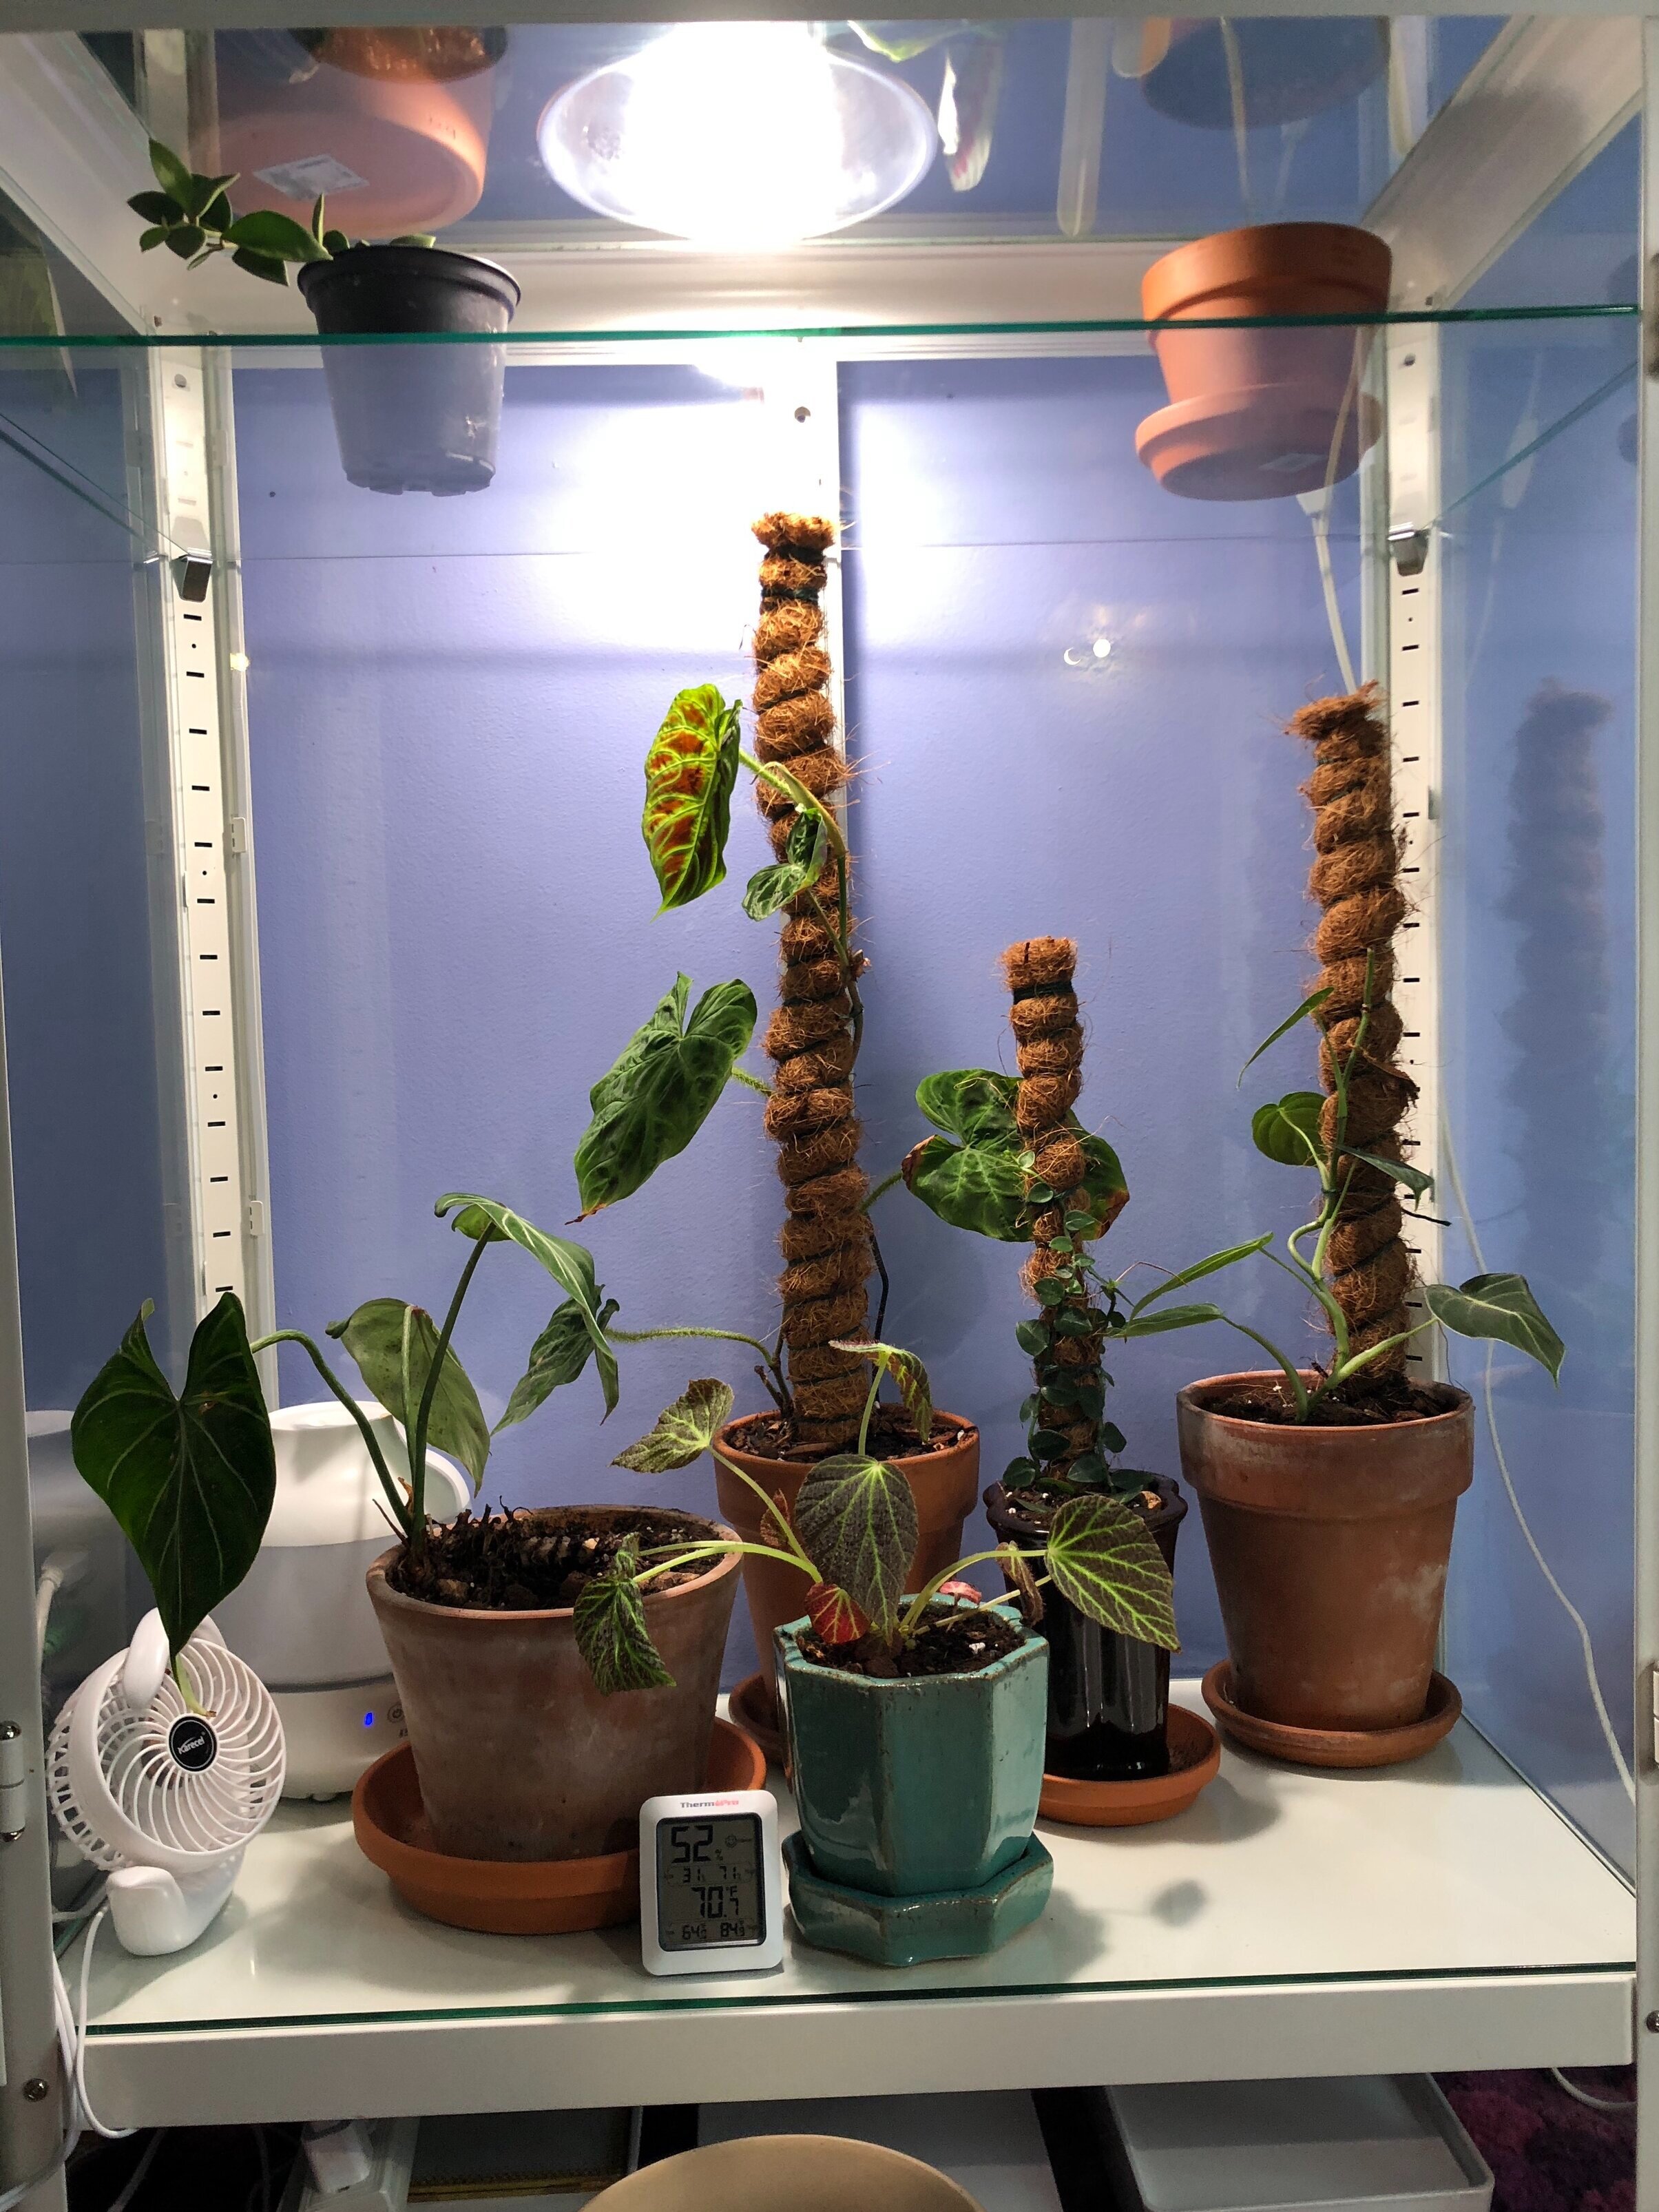
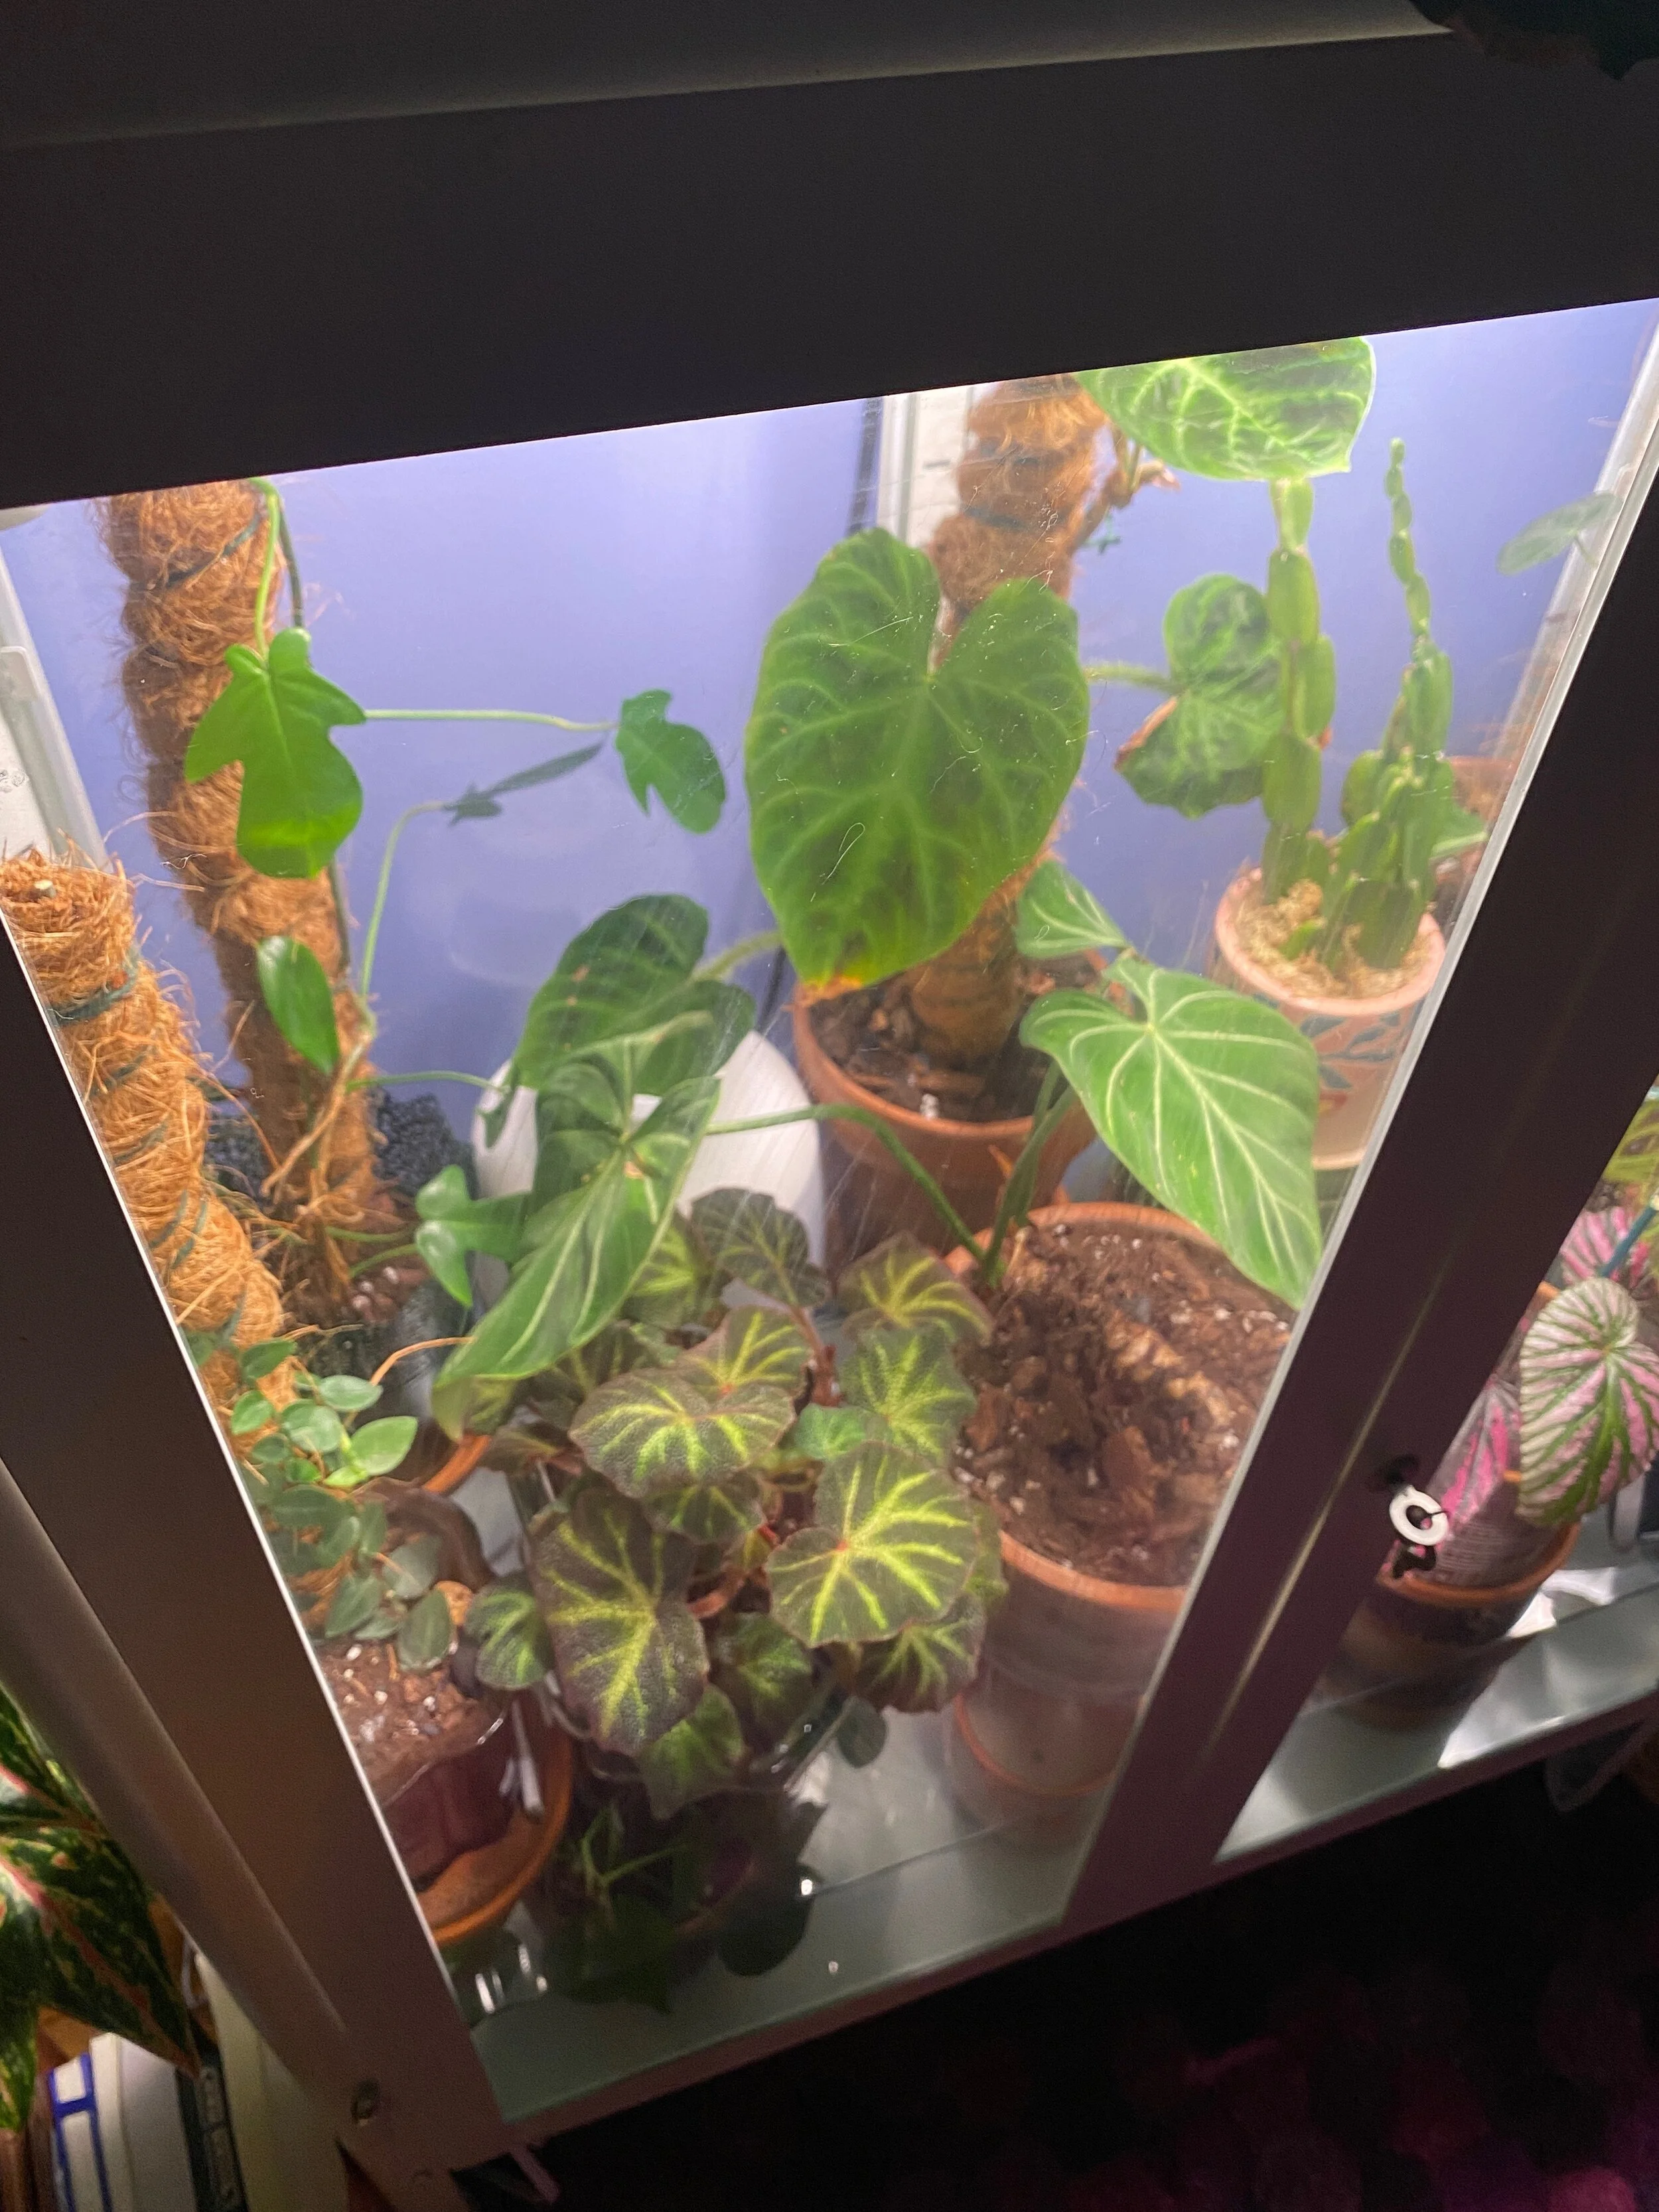
Moving the plants into the greenhouse and experimenting with the layout was the fun part! I turned the humidifier and the fan on during the experimental stage, and you can see that the humidity began to rise on the meter. This greenhouse was intended for my Philodendron verrucosum, Philodendron melanochrysum, Philodendron gloriousum, and Rhaphidophora Hayi. I knew they would be the type of plants to thrive in this environment. Although none of them have necessarily struggled outside of a greenhouse environment, I feel that I could do better for them, so this will be their special habitat. Although I don’t usually do anything special for my begonias, I also wanted to see how a select few will fare in the greenhouse conditions.
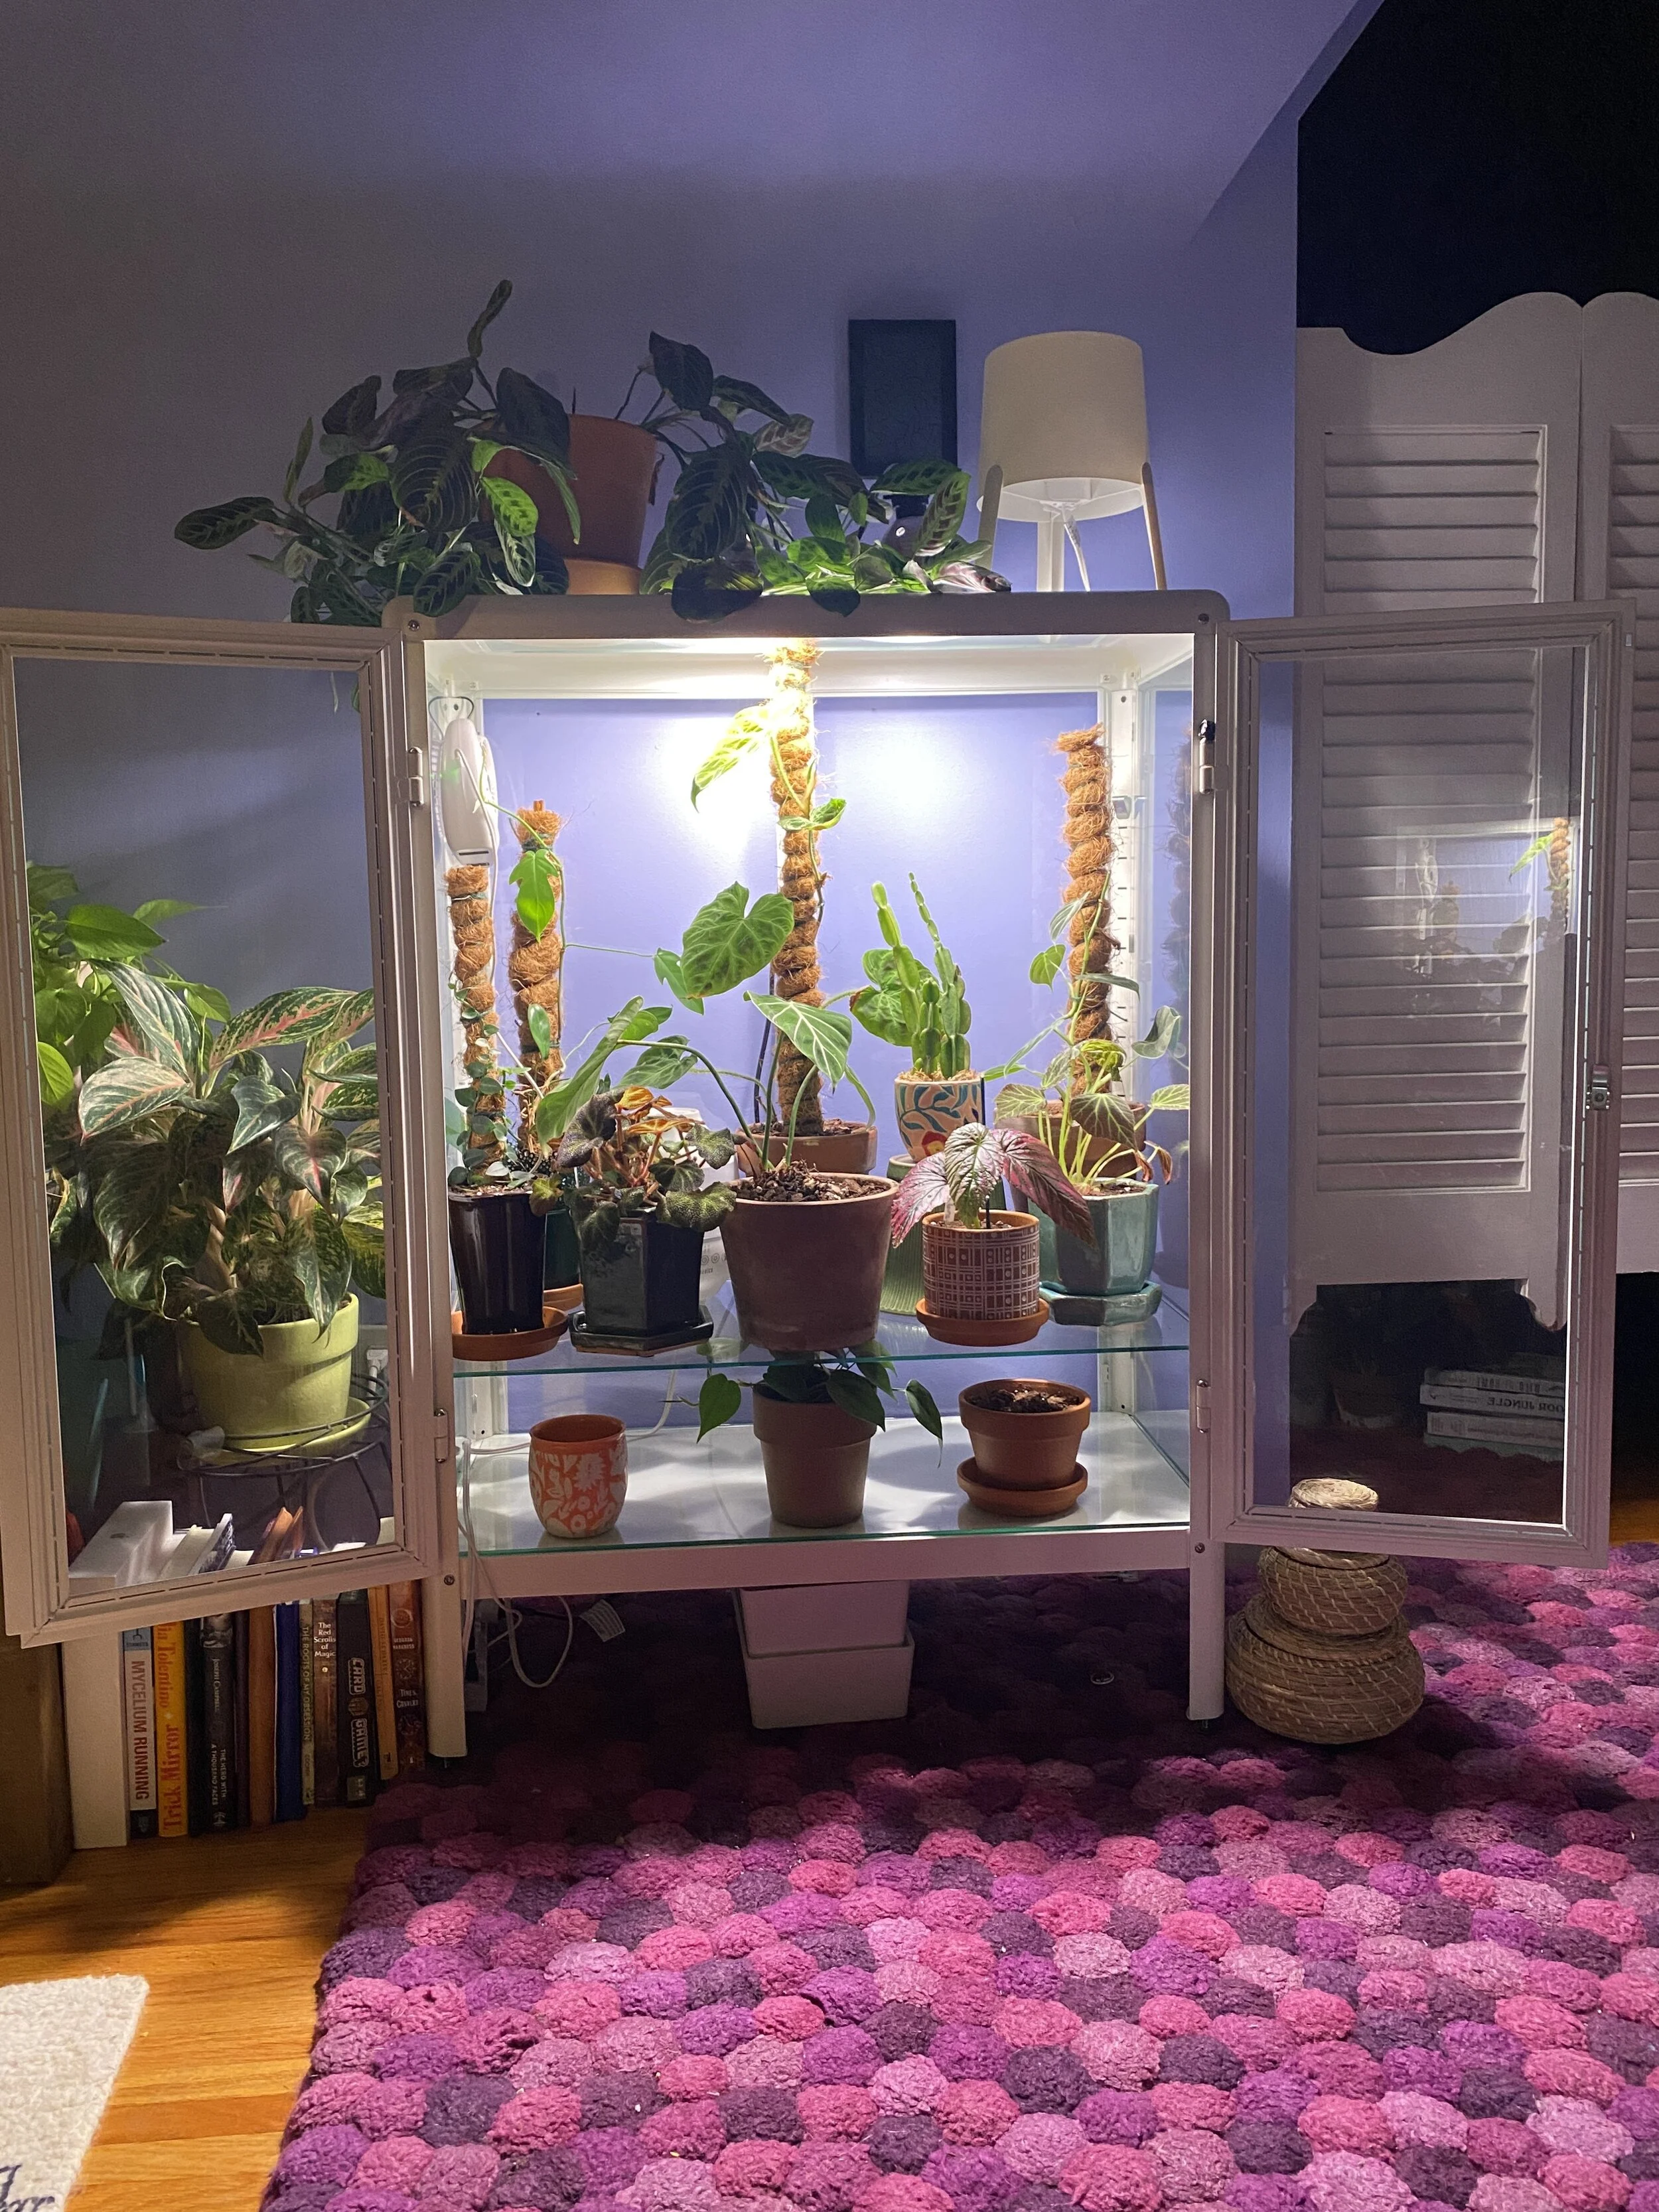
In the above photo, I had put the shelf near the top of the Fabrikör, but I later decided against that. I thought it might be a nice idea to get a second small fan and put my cuttings and compact plants on the top, but that didn’t work out visually for me. The small pots cast shadows and I was averse to the look of the horizontal line across the top of the greenhouse. I prefer the look of the shelf at the bottom of the greenhouse, as seen below. I decided that I will add a peg board to the back of the unit soon. I hung the fan from a hook in the upper corner of the Fabrikör where it can circulate air efficiently. I don’t love the look of it, which is why it will be nice to eventually have the peg board for hanging.

Humidity and Air Circulation
I quickly learned that the greenhouse won’t need the humidifier full-time. In fact, the humidifier that I have, which isn’t even a large capacity machine, is serious overkill for this small space. As you can see above, the humidity is at 90% and water has started to accumulate on the shelf. This is too high for my purposes. I decided to keep the fan on around the clock for circulation, but I only run the humidifier if I open the doors, or maybe for 15 minutes per day. The humidity fluctuates throughout the day, both up and down, even if I don’t run the humidifier.
Light
I’m using two GE LED Balanced Spectrum Br30 bulbs in the “Seeds and Greens” variety. I use these throughout my house and always have great results with them. They come in a “Fruits and Flowers” option, but I didn’t see the need for that. I grow my Begonias (and all other plants, for that matter) as foliage plants, so any flowers they produce are a bonus. I purchased my grow bulbs about a year ago, and I have noticed that the cost has gone up since then.
I’ve also had success with Ikea’s grow lights, though they’re always sold out when I go into the stores. I’d love to get my hands on the Ikea strip lights, but they don’t seem to be available in the U.S.
For the lighting setup, I placed the lamps on top of the glass as seen below.

They’re infringing on the space of a large Maranta, so the lamps are engulfed by leaves. The plant doesn’t mind, though. The lamps don’t get hot and it probably appreciates soaking up a little bit of bonus light.

The two lamp cables are loosely taped into place at the back of the Fabrikör. I recently used some very heavy duty tape for another project, and it ended up ripping the paint off of the walls when I tried to make a change to the tape placement. I decided it wasn’t worth it to use heavy duty tape to hold these cords. The cord management is just for aesthetics, and it won’t impact the way the greenhouse runs. Fortunately, the metal seams between the glass panels provide plenty of opportunity to hide the cables with little effort.

In Conclusion
The level of difficulty here is pretty low. Even assembling the Fabrikör is relatively straightforward if I look back to the time when I purchased it, brought it home, and put it together. I was able to do everything on my own.
As far as the greenhouse vibes, I found it less difficult than anticipated to create the desired conditions inside the unit and maintain them to my specifications. It has now been almost a week since I compiled the whole project, and I have noticed that the plants are thriving. I go out of town often, so I plan to put the humidifier on a timer for the days that I’m gone. My timers offer 30 minute increments, so that’ll have to be sufficient. The fan will remain on 24/7.
The best part for me was arranging and rearranging the plants. I’m sure the lineup will change over time. I have some humidity-loving plants on my wishlist, so if the day comes that I acquire one of those plants, I’ll switch it out for a plant that’ll be just fine in my normal home environment.
As mentioned, I didn’t spend more than $15 once I had made up my mind to make this greenhouse cabinet. I did purchase all the other materials at some point in the past, but within the last week, my cost was very low. With that in mind, I rate cost as the most unfortunate aspect of this project. However, if you are someone who has invested a great deal of money into plants with specific needs, then something like this might be necessary to keep them healthy over time.